Article
Laptop riser and external keyboard setup
A laptop on a dining table forces a compromise: either the screen sits too low or the keyboard sits too high. The durable fix is to split those jobs. Raise the display on a riser or stand, type on an external keyboard at elbow height, and place a mouse or trackpad beside that keyboard. This guide shows the three-piece setup, the mistakes that undo it, and a travel version when you cannot pack a full kit. It is educational desk guidance, not medical advice.
At a glance
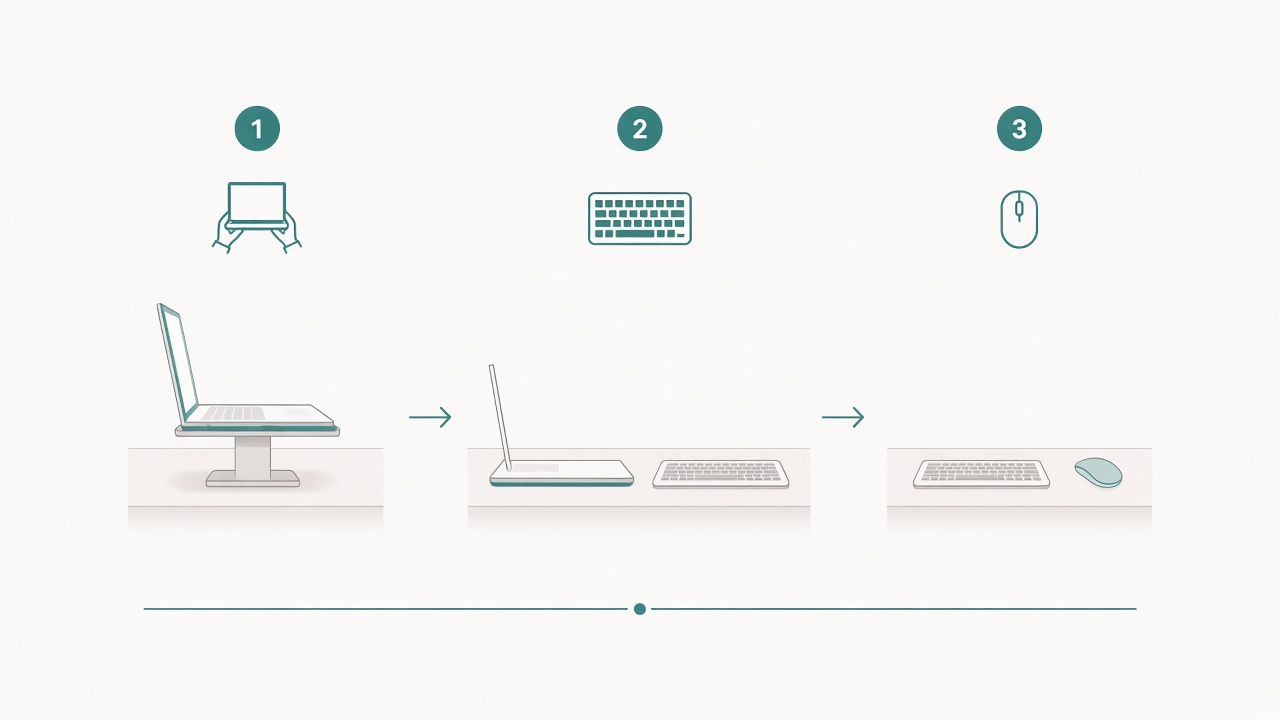
Raise the screen; type on a separate keyboard.
Why a laptop alone fights your posture
A notebook computer glues the display to the keys. If you raise the machine for a better view, your shoulders and wrists climb with it. If you keep the keys at a comfortable height, the screen drops and you look down for hours. That tradeoff is a design constraint, not a personal failure.
External pieces break the constraint. The riser owns eye line. The keyboard owns elbow angle. The pointer owns lateral reach. Once those roles are separate, you can tune each without breaking the others. The same logic scales from a temporary kitchen table to a permanent sit/stand desk.
Closed-lid “clamshell” use with an external monitor follows the same idea: the laptop becomes a computer in a stand or dock, not a combined screen-and-keyboard brick in your lap.
The three-piece fix
Start with three objects that stay together as a kit.
- Riser or stand lifts the display so the top of the screen sits near eye level when you sit tall.
- External keyboard restores a neutral elbow angle at desk height.
- Mouse or external trackpad sits beside the keyboard at the same height as the keys.
Set screen height first, then set keyboard height with the elbow rule used in the desk height calculator. Recheck viewing distance with the monitor distance calculator so you do not lean in after raising the panel.
A stable riser matters more than a fashionable one. Wide bases beat spindly frames that shake when you type nearby. Leave intake vents open on the underside and sides; a sealed cocoon under the chassis traps heat and noise.
Place the keyboard and pointer in the elbow zone
Bring the external keyboard close enough that you are not reaching forward from the chair. Elbows should stay near your sides with forearms roughly parallel to the floor. If you shrug to meet the board, lower the desk, raise the chair with proper foot support, or thin the stack under the keyboard.
Park the mouse immediately beside the board’s side edge. A notepad “moat” that pushes the pointer far right recreates shoulder travel even when shortcuts are strong. Match pointer height to the key tops. A mouse on a thick book beside a slim keyboard bends one wrist upward for the whole afternoon.
Wireless boards reduce cable mess; keep spare batteries or a charge routine so a dead keyboard does not force you back onto the laptop deck mid-deadline. Label the laptop’s power brick and the keyboard’s dongle so household lookalikes do not vanish into a shared drawer.
Common mistakes that recreate the laptop compromise
The most common error is raising the laptop and still typing on its keyboard. That choice restores the original conflict at a higher elevation. If your hands are on the built-in keys, the riser’s job is unfinished.
A second error is placing a compact keyboard so far forward that you perch on the seat edge. Compact size helps only when the board sits in the elbow zone. A third error is relying on the laptop trackpad alone for long days while the wrists stay planted and twisted at the front edge of the deck. An external pointer at matched height usually reduces that twist.
Unstable stacks of soft books also fail. They compress unevenly, dump the machine toward the user, and block vents. Use a rigid riser or a firm, wide stack taped as a temporary experiment, then replace it with something that does not migrate during typing.
Finally, people mirror the laptop screen onto a monitor but leave the notebook flat and close for “quick” typing. Pick a primary input layer for the work block. Mixing both keyboards without intention recreates reach and tilt confusion.
Heat, cables, and sit/stand details
Elevated laptops need airflow. Keep fabric, papers, and cable socks away from side and rear vents. On closed-lid days, give the chassis a hard surface and a little lift rather than burying it under the monitor stand’s shadow against a wall.
Route power and video cables with slack if the desk moves. A taut USB-C cable will yank ports when you stand. Mount hubs on the moving surface when you can so relative lengths stay stable. Color-band travel adapters if you also commute; the home riser kit and the bag kit should not fight over the only working HDMI dongle.
If you stand for calls, keep the external keyboard at standing elbow height and the camera near the raised screen’s top edge. Do not stand at a sitting-height keyboard while craning toward a low webcam. Meeting days still obey the same three-piece logic.
Travel days and temporary desks
When you cannot bring a full kit, prioritize an external keyboard and a stable height stack for the screen. A perfect stand matters less than separating screen height from typing height for the longest work block of the day. A foldable board plus two firm hardcover books under the laptop already beats a full day of diving toward a low deck.
Hotel desks and cafe tables vary. Spend two minutes on arrival: raise the display, place the keyboard, set the pointer, then check elbows and eye line. Photograph a working hotel setup once so future you can recreate it without redesigning from scratch under jet lag.
If baggage weight is tight, leave the full riser at home and keep the keyboard. You can improvise height more safely than you can improvise comfortable keys. Reverse that choice only when the site already provides a usable external monitor and keyboard.
Build a durable home station around the laptop
At a permanent desk, consider whether the laptop should remain the display. Many people prefer a separate monitor at eye level with the laptop closed on a stand beside or behind the desk. The three-piece idea still holds: screen height, keyboard height, and pointer height stay independent.
Budget in a sensible order. Chair and desk height first, then external keyboard and pointer, then riser or monitor, then cable control. A premium stand on a chaotic surface rarely feels transformative. A modest stand with a solid keyboard often does.
Revisit the setup after any new dock, monitor, or chair. One new thick mat under the feet can change elbow math enough that the keyboard needs a fresh height check.
Checklist
- Screen raised so top of display sits near eye level
- External keyboard used for long typing blocks
- Mouse or trackpad placed beside the keyboard at key height
- Elbows near sides; forearms roughly parallel while typing
- Laptop vents left open on a rigid surface
- Avoided typing on the laptop keyboard while it is raised
- Viewing distance rechecked after raising the screen
- Travel kit prioritizes external keyboard when weight is limited
- Sit/stand cable slack confirmed for video and power leads
FAQ
Can I use a stack of books instead of a riser?
Yes for testing if the stack is rigid, wide, and stable. Replace soft or wobbling stacks quickly. A trial stack is a measurement tool; a purpose-built stand is usually safer for daily use and airflow.
Do I need a mouse if I love the trackpad?
Not mandatory. An external trackpad at matched height still separates pointer posture from the raised laptop deck. Choose the pointer you will actually use for long sessions.
Is closed-lid laptop use safe for heat?
Many modern machines support clamshell use on a hard surface with clear vents. Problems appear when the chassis sits on fabric, in a sleeve, or in a hot pocket against a wall. Keep airflow first.
What height should the riser be?
High enough that you can sit tall and face the top third of the screen without nodding down, while the external keyboard stays at elbow height. If raising the screen forces you back onto the built-in keys, the kit is incomplete.
Should the laptop center on the desk or sit to the side?
Center the primary display you read for long stretches. If an external monitor is primary, the laptop can sit to the side on a stand. If the laptop screen is primary, center that raised panel and keep the keyboard centered under it.
Related tools: monitor distance · desk height